Keeping your business’s accounts in balance helps you make smarter business decisions. Here’s how to reconcile your accounts in QuickBooks Online, Intuit’s web-based accounting software, from accounts receivable to payroll liabilities to undeposited funds.
Account Reconciliation: What Is It?
Account reconciliation involves balancing your ledger. It is the practice of matching your account transactions with your bank, loan, liabilities, accounts receivable and credit card statements.
Why QuickBooks Reconciliation Is Important
Reconciling your accounts in QuickBooks Online should happen at least once a month when you receive your statements. Therefore, it’s important to ensure you aren’t missing anything that could cause your accounts to get out of balance.
This process will provide you with accurate financial data for your small business. It’s critical to keep a close eye on how much money you currently have, how much money is coming in and how much you owe. As you update your bank statements and other transactions, your balance sheet and profit and loss statements will be automatically updated by QuickBooks Online.
QuickBooks reconciliation can help accomplish the following:
- Identify any discrepancies
- Recognize potentially fraudulent transactions that you didn’t authorize so that you can take action
You’ll also need this information when it’s tax time. It’s much easier to reconcile QuickBooks online monthly than to try to recreate your financial information when your taxes are due.

How to Reconcile Accounts in QuickBooks Online
1. Select “Reconcile” After Login
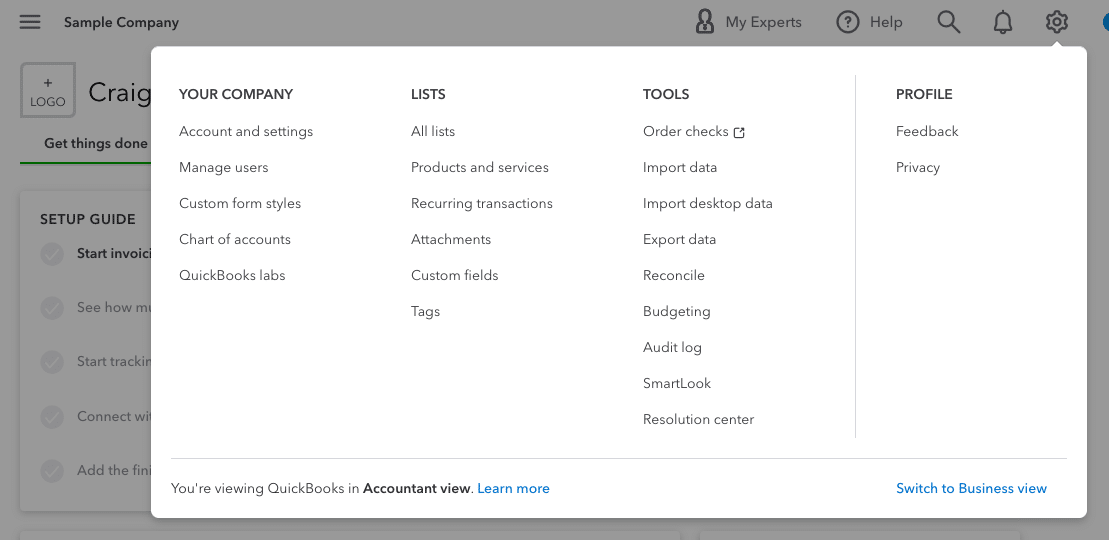
To start QuickBooks reconciliation, you’ll click on the gear icon near your company name on the home page. Then, click on “Reconcile.”
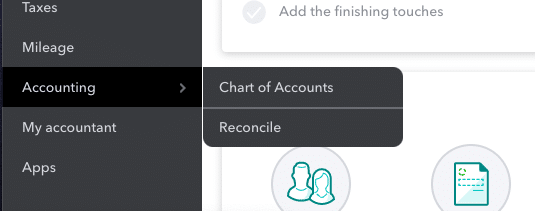
You can also go to the “Accounting” option on your dashboard on the left side of your screen. Run the mouse arrow over “Accounting,” and you’ll see 2 options: “Chart of Accounts” and “Reconcile.” Click “Reconcile”
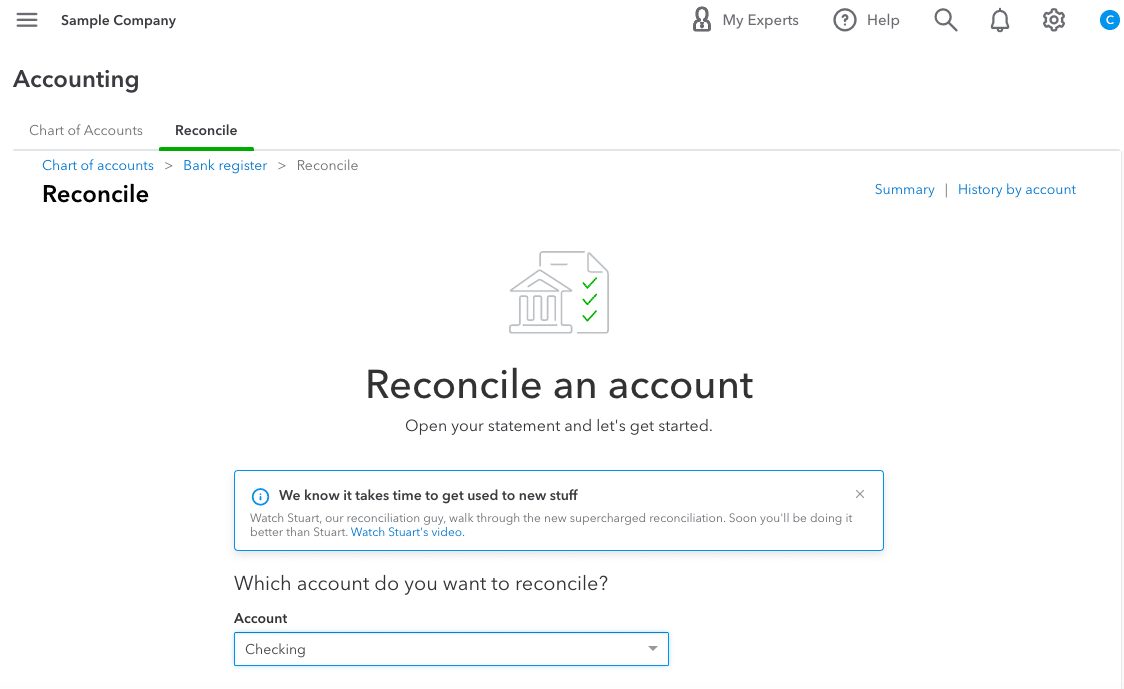
2. Start with Your Bank Accounts
For QuickBooks bank reconciliation, select the bank account and make sure QuickBooks is connected to your accounts online.
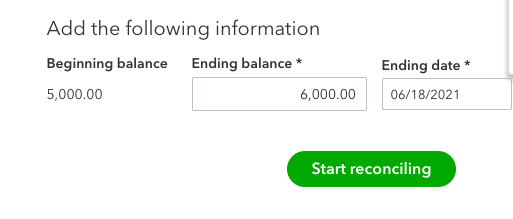
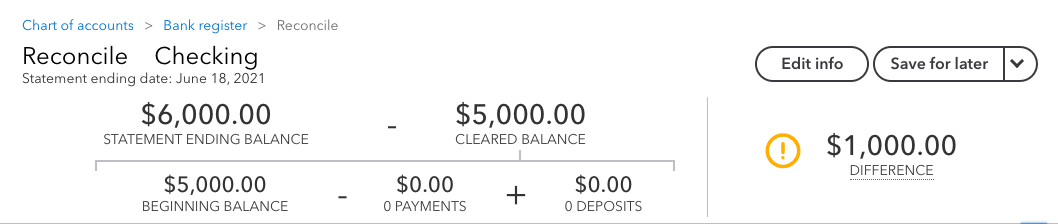
3. Enter Your Balance
You’ll need to fill in the beginning balance, ending balance and statement end date to reconcile QuickBooks online.
4. Compare Transactions Between Records

Next, you’ll match transactions that appear in both QuickBooks Online and your bank statement. You can also narrow the scope of your comparisons with the filter function and view transactions by type, the payee, the date range or status.
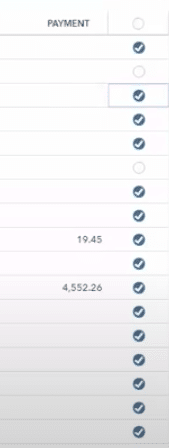
The last column includes checkmarks confirming there’s a corresponding transaction with the bank. Any payment without a checkmark has been manually entered into the QuickBooks form — not imported from your online banking — and there isn’t a record of a bank transaction. These transactions are added to the “Difference” section in the top portion of the screen.

Your goal is to get that difference down to zero, which will show a match of all transactions.
5. Review Any Differences
Go through your transactions and compare your charges and payments, which are summarized at the top of the screen next to the “Difference” statement. You can expand the top portion of the form for more details about the charges and payments.
Once a transaction is confirmed, click the circle to mark it complete — or “Clear” it.
-
QuickBooks Cleared vs. Reconciled
As you compare your bank account, credit card or other statements with your QuickBooks entries, you’ll ensure each accurate transaction is checked off, thus cleared in the system. The cleared transactions impact the Quickbooks’ recorded difference and, ultimately, the reconciliation.
When you have reconciled all your bank deposits and withdrawals, your cleared balance should match the statement ending balance, and the difference should be zero. If that isn’t the case, continue to investigate until you find the mismatch. Once you hit zero on the difference, click “Finish Now” to reconcile.
Repeat this process for any bank accounts, credit card accounts or other accounts you have. After your reconciliation is complete, you can generate a QuickBooks reconciliation report or go into your reconciliation history to access older reports.
What If There’s a Beginning Balance Discrepancy?
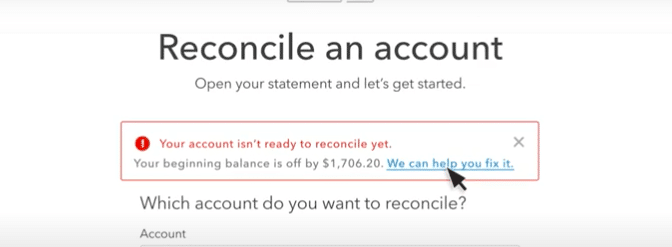
You can’t complete a QuickBooks reconciliation if there are problems with the beginning account balance. However, you can investigate and address any issues.
Click the link in “We Can Help You Fix It,” which takes you to a report that identifies the transactions that are causing the discrepancy.
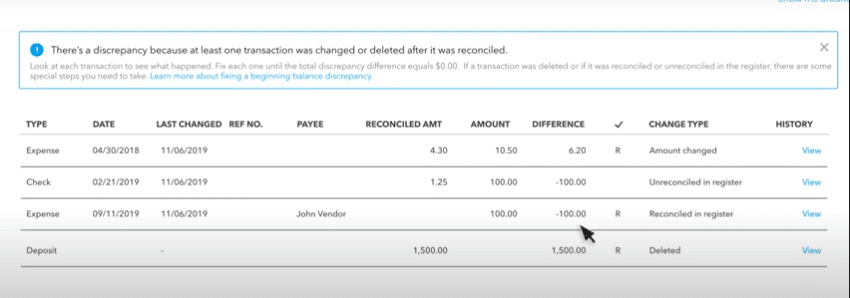
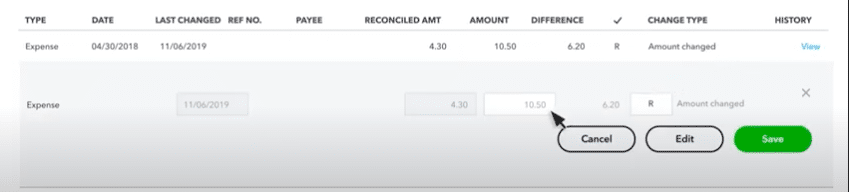
The “Change Type” column describes the action that’s causing the discrepancy.
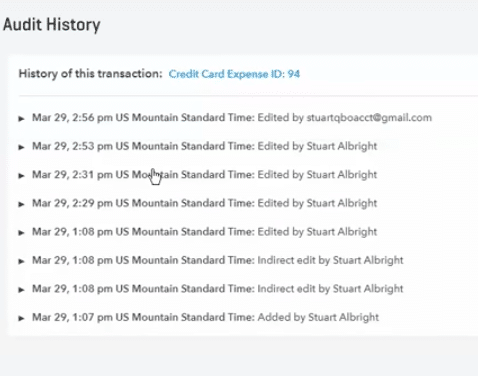
To view further details, go to the “History” column and click “View” for the transaction you want to examine. The audit history shows who edited the transaction and when.
If you’ve found you can reconcile the transaction, click on the entry to expand the view and edit the numbers. Save the changes to complete the reconciliation for that transaction.
If a transaction was deleted in error, you’ll have to re-enter the transaction into the system.
Note that you might have to further investigate discrepancies with your bank or discuss the matter with staffers who manage your business’s finances and/or handle your QuickBooks data.
How to Reconcile Accounts Receivable in QuickBooks
Knowing what money you have coming in is important to managing cash flow. Your accounts receivable (A/R) are tracked in a single account on the chart of accounts (COA) by QuickBooks Online, which tracks all of your outstanding invoices. As you create invoices in the system, they are added to your accounts receivable totals. As your invoices are paid, they are entered into the system to close out the invoice.
The QuickBooks Online reconciliation process for accounts receivable will take you through the same steps as any other account.
- Navigate back to the home page
- Click on the gear icon and select “Reconcile”
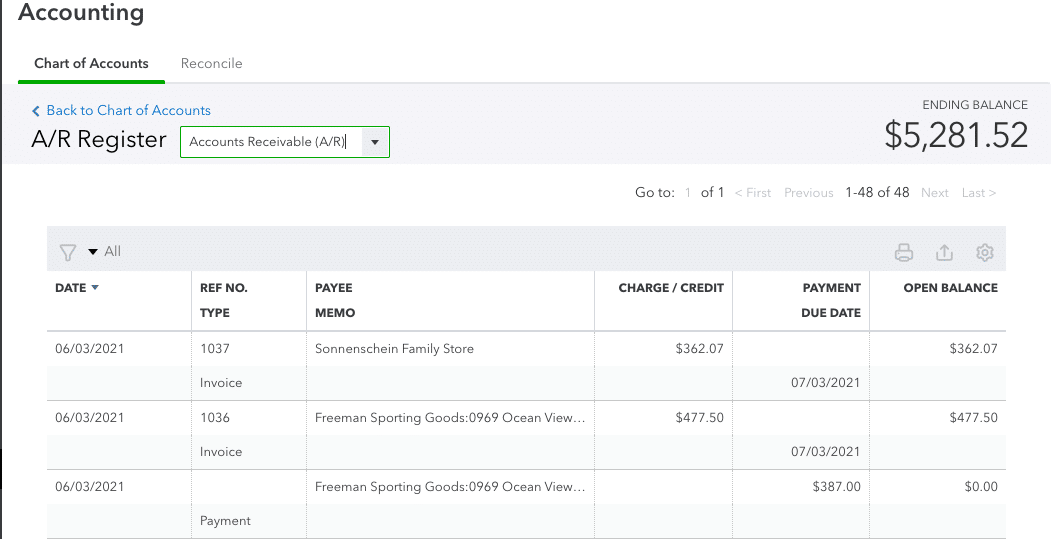
- Instead of selecting your bank or credit card accounts, you will select the chart of accounts this time.
- Check the differences. If your difference is zero, you are good to go. If not, you will need to investigate further to see what’s not lining up.
Separately, you will want to run accounts receivable aging report. This will show you what your customers owe and how old debts have become. From the Reports menu, select “Customers & Receivable” and then “A/R Aging Detail.” You’ll want to compare this to the Open Invoices Report to make sure the balances align. You can find the Open Invoices Report by going to Reports > Customers & Receivables > Open Invoices.
All of these reports should agree and align with your COA. An easy way to compare the two reports is by selecting multiple windows from the View menu. This can help you spot discrepancies as well as remind you to ramp up collection efforts for overdue invoices.